1. Locations
1.1 Worldmap editor
Let's customize the worldmap. First things first, we will need to change the texture for the worldmap.
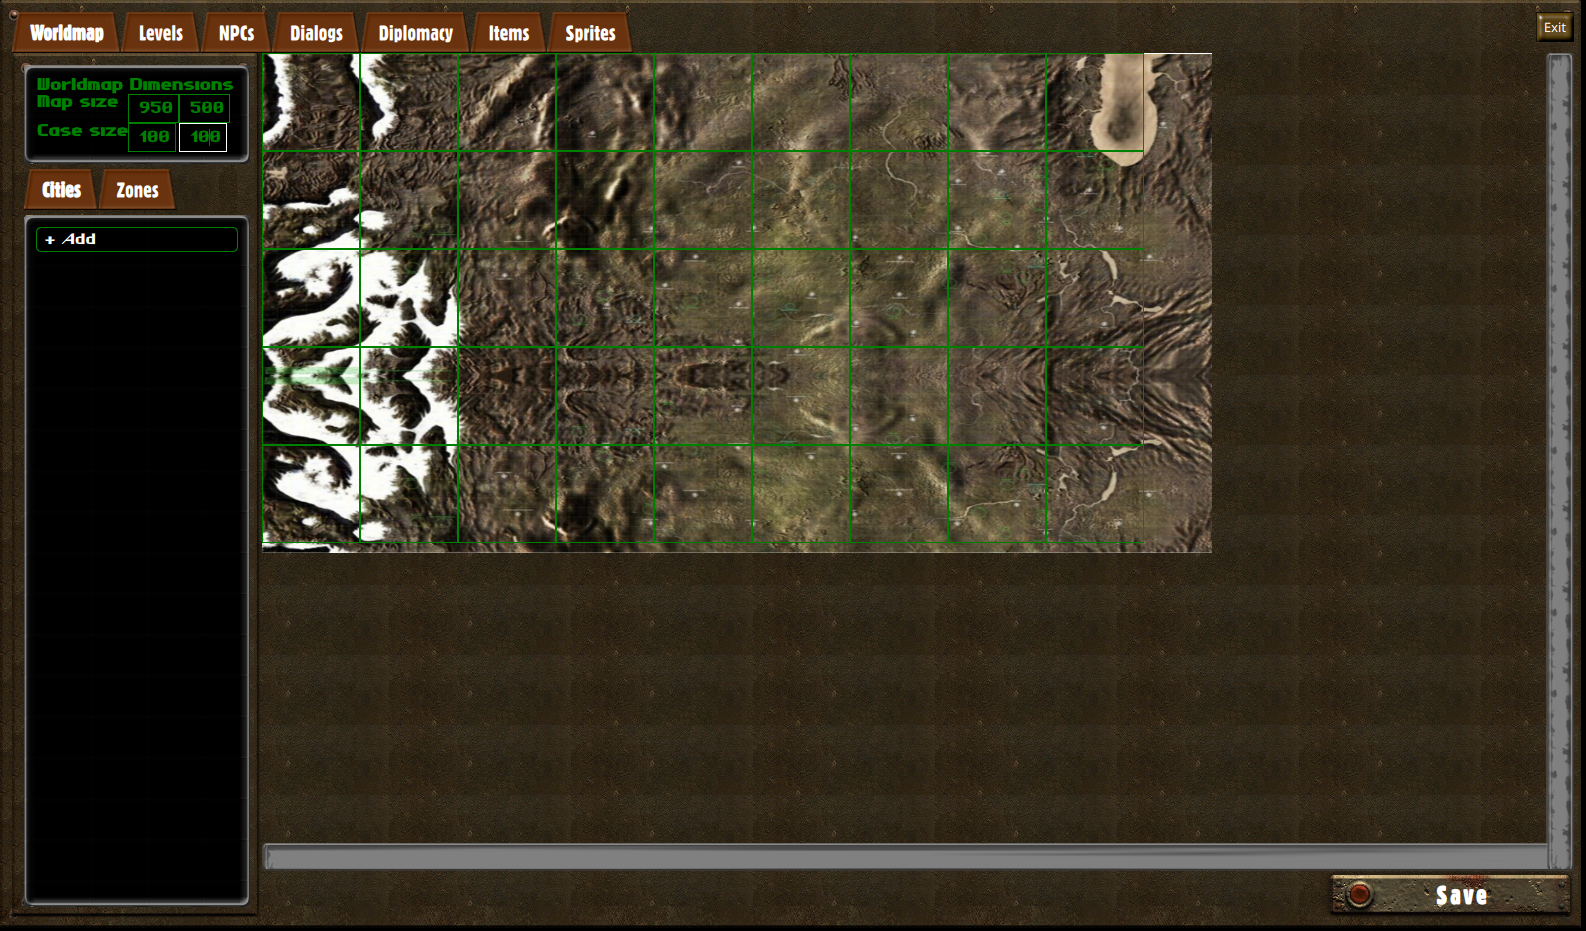
The path for the worldmap picture is assets/worldmap.png. Overwrite it with your own map before opening the Game Editor to the Worldmap tab:

On the top left hand, you can now use the inputs on the Worldmap Dimensions panel to change the size of the worldmap and the cases.
When picking a size for the cases, keep in mind that they are used for two purposes: hiding the parts of the map the player hasn't visited yet, and defining worldmap zones, which you can then use to grossly localize the player with scripts.
1.2 Location editor
The next thing we're going to do is to create visible locations that the player will be able to get into. Below the dimensions input, click on the Add button to start adding a new location:
The location editor form provides you the following inputs:
| Name | The displayable name of your location. If the value is "mytown", the translation key for the location's name will be "locations.mytown" |
|---|---|
| Level | The tilemap which we be loaded once the player enters the location. By default, the player's party will be inserted in the first entry zone that's marked as default, as seen in level design 1.7. |
| Position | The position of the center of the location in the worldmap |
| Size | The diameter of the location on the worldmap |
Don't forget to click on the Save button to save your changes.
1.3 Scripting worldmap locations
But wait ! We're not quite done. Locations can also be added or modified dynamically through scripts by using the game.worldmap global object.
export function initialize() {
  const location = game.worldmap.createCity("mytown");

  location.position.x = 250;
  location.position.y = 250;
  location.size = 100;
  location.level = "sample-city";
  game.worldmap.revealCity("mytown");
}
In this game bootstrap script, we create a location called mytown (the translation key for the location name is thus locations.mytown), set a position and size, and define that it will send the player to a tilemap called sample-city.
The last line of the script calls revealCity, which will reveal the location within the player's worldmap: the case on which the city resides will become visible to the player, even if he didn't explore it beforehand, and a button will appear on the sidebar for the player to quickly start traveling towards the location.
You can also edit or remove the location later by calling game.worldmap.getCity("mytown") or game.worldmap.removeCity("mytown").
2. Zones
2.1 Zone editor
Worldmap zones are used to categorize parts of the map, and handle things like movement speed on the worldmap, or scripted worldmap behaviours, such as random encounters type.
To start adding a zone, go to the Zones tab below the dimension inputs, and click the Add button:
When the zone editor is opened, you can click on cases to add or remove those from the current zone.
The mov.speed input allows you to control the player's speed when he's traveling. The default movement speed is 5. When multiple zones overlap, the lowest movement speed will be used.
2.2 Zones in scripts
Worldmap zones can also be used for other purposes: that's all up to you. One useful thing you'll probably want to do is figuring out which zones the player is currently in. This can be achieved using game.worldmap.getCurrentZones. This method will return the names of all the zones the player is in.
It is also possible to create new zones from script by calling createZone and adding cases to the zone by using addCase on the returned object.
export function initialize() {
  const zone = game.worldmap.createZone("myzone");

  zone.movementSpeed = 3;
  for (var x = 5 ; x < 10 ; ++x) {
    for (var y = 2 ; x < 5 ; ++y)
      zone.addCase(x, y);
  }
  zone.removeCase(6, 3);
}
Note that you can also do these actions on existing zones, by getting a handle on the zone using game.worldmap.getZone("myzone"). You may also remove the zone later by calling game.worldmap.removeZone("myzone").
3. Encounters
3.1 The outdoors tick
The outdoors tick is a callback in the Game script object that is regularly called when the player travels. Keep in mind that in real time, it is called every 50ms. In the worldmap, it corresponds to 14 minutes of game time.
export class Game {
  outdoorsTick() {
    game.appendToConsole("14 minutes have passed");
  }
}

export function create() { return new Game; }
This doesn't do much yet, but we can use that to implement more complex behaviours, such as random encounters, or any type of event that should happen while the player is moving on the worldmap.
3.2 Setting up an encounter